probe-rsexport_start_codemicros_since_bootcyclesos_align_cyclesmark_dirty_rectDisplayColor.Optional.fromDisplayColor.Optional.unwrapblitlineovalrecttexthlinevlinetonetone2set_global_volumerandtracepresentread_flashwrite_flash_pagefn_zonefn_zone_colorzonezone_colorfn_zone_condfn_zone_color_condzone_condzone_color_condspin_lock_acquirespin_lock_releaseThe hard work of updating the Badge from V1 to V2 was largely done as a capstone project at the University of British Columbia. The team comprised of:
The design for this manual is based off The Proportional Web by Oskar Wickström
Congratulations, you’re the owner of a brand new SYCL Badge V2. With any luck, you’re currently at Tables Day, hanging out with your friends during Software You Can Love 2026. If you don’t have a badge there is a simulator that runs in the browser.
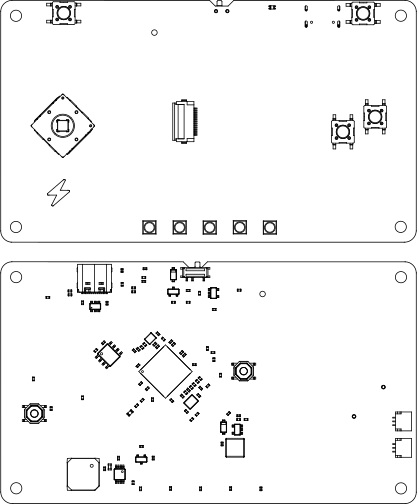
The Badge is a constrained, programmable device for you to write, share, and run programs called “carts”. The custom OS allows for multiple carts to be installed, executing only one at a time. There exist several means for carts to interact with the outside world, including but not limited to: buttons, a nav stick, an LCD screen, and five RGB LEDs. Carts can be loaded from your personal computer onto the Badge through USB.
This second version of the Badge largely came about due to part sourcing issues. Modernizing components fixed this issue, reduced costs, and improved performance. The most notable upgrade was changing the MCU to an RP2354. It has a hardware USB bootloader, which allows users to recover from a bricked state if they decide to author their own OS. The hardware upgrades include:
| Feature | V1 | V2 |
|---|---|---|
| MCU | ATSAMD51J19 | RP2354B |
| CPU Count | 1 | 2 |
| CPU Frequency | 120 MHz | 155 MHz |
| CPU Core | Cortex M3 | Cortex M33/RISC-V |
| Flash | 512 KB | 4 MB |
| RAM | 192 KB | 520 KB |
| Battery | 3.7V LiPo | 3x AAAs |
* RISC-V cores are not utilized in the Badge V2 at the time of writing.
Carts are currently written in Zig, but more languages will be supported in the future. The Zig version required is currently 0.17.0. Clone the repository with:
git clone https://github.com/ZigEmbeddedGroup/sycl-badge
Then from within the project you may build all the examples (and more) with:
zig build
This will take a few moments. It builds all the tools in MicroZig needed to generate code, as well as the Badge OS.
Once the build is complete you will find a mix of file extensions:
elf: The original container file, not usually useful unless debugging, developing the kernel, or inspecting generated output of the compiler.uf2: The file that will be used to load carts onto the Badge. These are transferred over USB using a Mass Storage Class Interface. This will typically be presented to the user as a mounted drive.wasm: The same application, but cross-compiled for the browser-based simulator.We will be using the uf2 file to upload our cart here. when you plug in and turn the power on the badge, most PC operating systems will automatically mount the drive. Our drive will be named SYCLBADGE. To load a particualar cart, copy or move the file to the mounted drive. You will see a progess indicator on the screen until it is completely transfered. It may be run at this time.
If you are familiar with the Zig build system, and wish to publish your cart as a standalone code repository, then using sycl-badge as a dependency is suggested. If you wish to contribute your application, are unfamiliar with the Zig build system, or want to hack on the Badge OS, then it’s suggested to fork this repository.
For SYCL 2026, the Badge will come with the OS installed. For beta testers or those wishing to hack on the kernel, there are two methods to flash the Badge with a new kernel. The first is to use the pico debugger that came with the badge. See Using the Pico Debugger.
The second is to use a similar process as loading a cart, but instead of the OS loading a cart to external flash, you’ll be using the RP2350’s hardware UF2 bootloader to install the kernel. Once you have built from source you need to:
RESET and BOOT_SEL buttons at the same time.RESET button.BOOT_SELL button.RP2350 mounted drive shows up. Linux may require manully mounting it.zig-out/firmware/sycl-os-kernel.uf2 to the newly mounted drive.This will cause the drive to disappear and the Badge will reset, running your new OS firmware build.
probe-rsprobe-rs or tools like it, such as OpenOCD, are not required for regular programming of the Badge. It is, however, required if one wishes to use the debug probe. Please install by following these instructions.
Once complete, plug in the debug probe to the badge using the SWD/D ports, and to your PC. Connect the Badge to that same PC, and flip the power switch to the ON position. Run probe-rs in a terminal with the following arguments:
probe-rs gdb --chip RP235x
Make sure you have gdb-multiarch or arm-none-eabi-gdb installed, you need support for ARM:
arm-none-eabi-gdb ./zig-out/firmware/debug/sycl-os-kernel.elf
The following command tells GDB to speak with OpenOCD on localhost port 3333 using the GDB remote serial protocol.
target extended-remote :3333
You should see some logs from OpenOCD, and you can flash the Badge with the load command. From there you have a regular GDB debug session set up and you can begin poking around the program.
Do not use this method to flash carts, it does not currently work.
RTT provides a method of IO between your Badge’s microcontroller with your PC over the pico debug probe. It can be used to set up multiplexed streams in either direction. It makes use of static buffers, and can be configured to skip, trim, or block when there is not enough room in those buffers.
RTT does not require the CPU to halt in order to transfer data. The debug access port is able to issue it’s own bus transactions separate from the CPU, though this does mean the two may contend for memory bandwidth. The Badge is currently set up to use RTT for logging and sending profile data to Tracy.
When working on the kernel and using RTT for logging, adding this to your .gdbinit file is useful for iterating. It connects to OpenOCD on the default port, runs the kernel until the RTT control block is initialized, and registers it as port 60000 on your localhost.
target extended-remote :3333

define rtt-init
    set $rtt_addr = &RttControlBlock
    eval "monitor rtt setup 0x%x 0x40 \"SEGGER RTT\"", $rtt_addr
    monitor rtt start
    monitor rtt server start 60000 1
end

monitor reset halt
load
break drivers.rtt.rtt_initialized
run
rtt-init
delete 1
Start off by putting the Badge into the right state with:
gdb ./zig-out/firmware/debug/sycl-os-kernel.elf
Confirm that the control block was found, and that the port has been opened, you will see this in both the GDB and OpenOCD logs. Then in a separate terminal run:
nc localhost 60000
Or some other raw port dumping command like telnet, and you should see the first couple logs. From here you can continue debugging, and you’ll find the logs show in this session. Note that when you rebuild the kernel, you’ll be able to reflash the Badge with the load command. The RTT session will persist and you’ll see the printout for when the kernel starts up as you continue to debug.
| name | type | value |
|---|---|---|
| screen_width | u32 | 160 |
| screen_height | u32 | 128 |
| font_width | u32 | 8 |
| font_height | u32 | 8 |
| flash_page_size | comptime_int | 256 |
| flash_page_count | comptime_int | 8000 |
| tracy_buffer_size | comptime_int | 4096 |
| name | type | address |
|---|---|---|
| controls | Controls | 0x20020004 |
| light_level | u12 | |
| neopixels | [5]NeopixelColor | |
| user_led | bool | |
| framebuffer | [160][128]DisplayColor |
ControlsFields
| Name | Type |
|---|---|
| start | bool |
| select | bool |
| a | bool |
| b | bool |
| click | bool |
| up | bool |
| down | bool |
| left | bool |
| right | bool |
BlitOptions| Name | Type | Default Value | Description |
|---|---|---|---|
| sprite | [*]const DisplayColor | ||
| x | i32 | ||
| y | i32 | ||
| width | u32 | ||
| height | u32 | ||
| src_x | u32 | 0 | x within the sprite atlas |
| src_y | u32 | 0 | y within the sprite atlas |
| stride | ?u32 | null | Width of the entire sprite atlas |
| flags | Flags |
BlitOptions.FlagsFields
| Name | Type | Default Value |
|---|---|---|
| flip_x | bool | false |
| flip_y | bool | false |
| rotate | bool | false |
OvalOptionspub const OvalOptions = struct { x: i32, y: i32, width: u32, height: u32, stroke_color: ?DisplayColor = null, fill_color: ?DisplayColor = null, };
ToneOptionsDeprecated, Mostly unsupported on Badge v2. Use Tone2Options and tone2() instead.
export_start_codemicros_since_bootcyclesCycle count for profiling. This must be called at least once every 30 seconds to maintain accuracy. The OS will call it before every update() to maintain this, but if update() ever takes more than 30 seconds there may be mistakes.
os_align_cyclesAligns core 0 and core 1 cycle counts for profiling. If you have an extremely long update (30+ seconds), or you put core 1 to sleep, you can call this to resynchronize and restore correct timing in tracy. This function must wait until the OS is ready to synchronize timing, which could take several milliseconds in the worst case.
mark_dirty_rectDisplayColor.Optional.fromDisplayColor.Optional.unwraptoneDeprecated, Mostly unsupported on Badge v2. Use tone2() instead.
tone2Plays a sound tone via the hardware buzzer. Cancels any other audio that might be playing. Sends CART_TONE IPC to kernel; kernel plays via gpio.buzzer or I2S depending on board revision.
set_global_volumeAdjust the volume of all audio, 0.0 - 1.0. This is a perceptually linear scale from about -50dB to 0dB adjustment from the maximum speaker volume.
randReturns a random number from the RP2350 ring oscillator random bit. Useful for seeding a faster PRNG.
tracePrints a message to the debug console. On native: copies string to shared buffer and sends CART_TRACE via FIFO; kernel prints to UART. Used by Blobs and other carts for panic/debug output.
presentSignal Core 0 that the framebuffer is ready and wait for the LCD flush to complete before returning.
Call this once per frame (typically at the end of update().attrs(‘doc-entry’)). On WASM this is a no-op because the simulator owns the display.
read_flashAttempts to fill dst, returns the amount of bytes actually read. NOTE: No dedicated cart save-data flash region exists yet; returns 0.
write_flash_pageNOTE: No dedicated cart save-data flash region exists yet; this is a no-op stub.
fn_zone_colorzonezone_colorfn_zone_condfn_zone_color_condzone_condzone_color_condSWD and UART JST connectors are wired incorrectly, the pins are reverse from what they need to be in order to match the cable for the pico debug.
The SDA and SCL connections on the I2C connector are wired incorrectly. The GPIOs they are connected to have the other’s required alternate function. This means that in order to use the I2C connector to interact with an external device, either a PIO block needs to implement I2C, or the wires need to be swapped physically.